Production
Let’s begin with production, where the image is captured. A good plan of attack is starting with best scenario for image capture. The capture might be camera RAW or a compressed format such as ProRes. In either case the image will be captured to a hard drive or mag, which will be downloaded to another hard drive. A qualified person will generate proxies for editorial and make an archive, often to LTO tape but sometimes to another hard drive.
What you get with camera RAW is the highest quality the camera is capable of producing. No processing, no image manipulation (except for data compression in some cases), the least chance for any problems. RAW is the unprocessed light information that is hitting the sensor. Shooting RAW moves the image processing from the camera to a workstation, reducing the chance for data loss and maximizing image quality. And you can choose where in your workflow it occurs and which tool you use to do it with. A quick explanation of debayering – a term that you’ll hear in any discussion of RAW capture and processing. An ARRIRAW file, for example, requires debayering because it’s a single channel image representing the raw Bayer pattern readout from the sensor. One way to think of RAW is as a digital negative. And like a film negative, it requires processing to convert the single channel image into a color image suitable for viewing. Dr. Bruce Bayer of Kodak patented the Bayer pattern in 1976, mimicking the color sensitivity of the human eye, which is not equally sensitive to each color. 50% of the sensor’s photosites are used to represent green, 25% of the photosites represent red and the remaining 25% represent blue. Debayering is the processing of the RAW image whereby a color reconstruction algorithm calculates the missing components for each pixel. Now here’s the cool thing, and a great reason to shoot RAW – debayering algorithms vary and have already improved over time. So, once you’ve shot RAW, you’ve got a digital negative that you can go back to in the future and it could look even better.
ARRIRAW Facts
Technical advances mean that the differences between shooting RAW and an RGB format like ProRes have lessened over time. But if you can shoot RAW and utilize an efficient workflow so the cost differences are negligible, why not do it? Why not use the RAW image from the camera sensor with no file conversion or transcoding? Even if the image quality differences are negligible, there may be advantages in how noise, edges and out of gamut color are handled. It’s hard to predict whether any of these will apply on a particular production but why take a chance? And as mentioned above, debayering techniques are improving over time and are usually backwards-compatible so you might be able to take advantage of them in the future, perhaps if you need to re-master for HDR or an as yet undiscovered display technology. Of course, these are all decisions that should be thought through prior to shooting and budgeted accordingly.
Storage
The most common argument against capturing RAW is file size and the expense of storage. Both camera storage and external storage of the recorded data can become more cumbersome. Once this was a valid argument, but nowadays it is a head scratcher, considering the reduced cost of storage. Also with higher resolutions, the ProRes 4444 files are nearly as large as compressed RAW files. Strategies like smart and efficient data management on-set, mitigating any backlog of data by using the ‘early and often’ mantra of downloading early and often between set ups, as opposed to waiting until a mag is full, applying a more ‘film style’ of shooting rather than running endlessly. This will reduce the number of camera mags needed and reduce the rental budget. As for storage of your dailies, consider how affordable and accessible storage is today and how fast and efficient computers have become. Now consider this - someone spent days, maybe years writing the script, someone spent hours, days and years securing funding, someone spent time casting and coordinating, there were countless meetings and discussions about ‘The Film’, all leading up to that moment of actually making the film and someone else says… “let’s compromise to save a few dollars on storage?”
Let’s digress for a moment and discuss compressed RAW as that’s something that can have an impact on storage needs. Sony, RED and Black Magic use a compressed RAW format but ARRI and Panasonic have chosen to utilize uncompressed RAW. Whilst this obviously has an impact on file sizes and storage needs – for example, for an hour of footage, the RAW formats (ARRIRAW and VRAW) require around a terabyte of storage whereas the compressed RAW formats (REDCODE, Sony XOCN and BMRAW) require around half a terabyte per hour. But, given the cost of storage, this shouldn’t deter anyone from shooting an uncompressed RAW format, especially given technical breakthroughs like Codex’s High Density Encoding (HDE).
HDE is a lossless encoding technique optimized for Bayer pattern images and provides bit-exact data reduction of uncompressed camera ARRIRAW files from cameras like those in the ARRI ALEXA family. It can reduce file sizes by up to 40%, a significant reduction that can make shooting ARRIRAW more cost-effective and efficient.
Editing
The process of editing is almost identical from one film to the next, no matter what the camera original files are. If, for instance, you do choose to capture camera RAW, from that RAW file a proxy can be generated to meet the creative needs of the editor and limitations of their particular system. You could choose to edit in standard definition (480P) if you wanted to, but more than likely something like a 422LT (1920P) HD proxy is suitable for most. When the RAW file is transcoded to a usable QuickTime edit format, the metadata from the camera as set by the cinematographer can be carried over and the general ‘look’ of the film can be seen from day one in the edit suite. That same metadata is always accessible through the post pipeline even as a guide through final color if transcoded properly and managed accordingly. Editorial shouldn’t really be concerned with shooting RAW so much as just making sure all the files are organized properly. Editorial is typically the most compressed of all images as the entire movie and versions are stored with the editor. Starting from RAW versus ProRes, the images in editorial are sharper.
Finishing/Color Grading
One option for finishing a lower budget production is to use the consolidate media function built into an editing system to duplicate every camera RAW clip used in the timeline into a separate folder, preferably on a new edit master external hard drive. Through this process your editing system will generate what is known as an XML or AAF (Avid). This is the editorial script that tells your editing system to replace your offline proxy files with camera RAW. This XML or AAF along with the new edit master drive should be duplicated and checked by the editor, and hopefully the director and producer, for confirmation before being sent to color grading.
Some post facilities may convert the RAW files to a format such as EXR or DPX, particularly if there are many VFX shots (because these will be delivered from the VFX facility in one of these formats). But sticking with the RAW files eliminates an additional conversion stage and saves on storage. Because of this, some post facilities recommend sticking with RAW, particularly for lower budget productions that have used a compressed RAW format because they would have to convert to an uncompressed file format which would of course use up more disk space.
Distribution
Hopefully your goal is to make a film that gets distributed and seen by millions of adoring fans, or at least that’s what your best boy electric was hoping for around hour 16 when he was texting his aunt in Sheboygan, WI about this cool film he’s working on. Distribution is important and something few filmmakers consider and a great argument for the ‘best foot forward mantra’. You have to think about the endgame and that includes QC by distributors. In a recent Indie Film Hustle podcast, host Alex Ferrari lamented the quality control inspection of films for distribution on many streaming and theater platforms, his personal experience is wrapped up here: "QC is easily one of the most heart-breaking and brutal parts of the post-production process. When you think you are finally done you get the QC report back to find you have a lot of work to do. From a dead pixel in Camera B, to copyright material in a shot, to color shifts… it seems to never end. Please for the love of God spend the money on a good post-production supervisor so he or she can catch many of these issues before you get to QC. It will save you money, time and sanity.”
Tying it all together
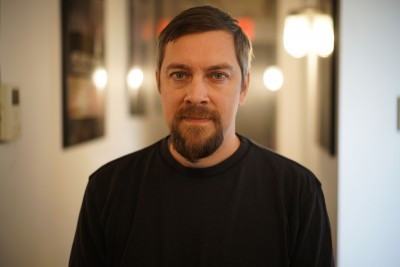
Let’s look at a low budget feature film project that utilized a RAW workflow from camera through editing and color grading. Filmmaker Benjamin L. Brown recently completed Severed Road, a production on which he wore almost all the hats - he wrote, directed, produced, shot, costumed, and was the prop master and set builder. The same held true for post-production – he edited picture and sound, created the VFX and did the final color. This low budget horror flick was shot with the Black Magic Ursa Mini. Ben chooses to work with RAW on all his projects, previously shooting with the BMCC 2.5K on Harbinger Down, explaining, “I can get the most out of the camera during shooting and image during post. I truly believe there is no better way to shoot.” Because of all the tools it includes, Black Magic Design’s DaVinci Resolve was the obvious choice for post – Ben used it for editing, color grading and delivery.
Learn more about Ben and his work here - www.oddioworks.com
There are plenty of tools available from cameras through to post-production that enable the low budget filmmaker to shoot at the highest possible quality RAW format and maintain that quality through to delivery using an efficient and cost-effective workflow. Working with a restricted budget doesn’t mean compromising on image quality. Just make sure you consider your workflow from camera through to delivery before your first frame is captured.