How we lit Mick
Author: Dennis Lennie
Published 1st January 2009
Shine a light
Lets start at the beginning with the most fundamental, basic of questions – what’s the point of lighting anything, let alone a living legend like Sir Mick Jagger? The answer is simple – because lighting is the most important part of the whole process. Not the filming. Not the fiddly edit. Not the chin-scratching pre-production. The lighting, every time. And if anyone tries to tell you otherwise cover your ears and say “la la la, I’m not listening”. That’s the mature way to deal with it.
You want to make something on a 2D surface, in other words a TV screen which is just a flat surface of lights and colour – appear 3D, which is the world around us and people like Mick Jagger. How do you do this? You do this not by magic or smoke and mirrors but by manipulation of light and shadows. Which add depth and texture to objects and tell the viewer “this is 3D”. Be an illusionist. Go ahead. Have a go.
Remember the human eye sees three things first:
1 The SHARPEST thing
2 The BRIGHTEST thing
3 The thing that’s MOVING
This is your 1-2-3 check list that you keep in your head when lighting. In our situation this translated roughly into meaning:
1 Sir Mick is the SHARPEST thing, in particular you want those blue eyes of his to be razor sharp because people look at the eyes. Both eyes. Every thing else will be out of focus, especially the background. If something is out of focus it looks further away. It’s an illusion. And you’re an illusionist now, remember.
2 Sir Mick is the BRIGHTEST thing, which means everything else will be duller, so dim the light on the background down a notch or two. Go as low as you can, you can always boost it in post.
3 Only Mick MOVES. And those famous lips. Nothing else. Especially not the background. No distracting backgrounds from now on.
Light of my life
Ok lets get on with lighting Mick. We’ve only got limited time. Remember there are only two sources of light you can try to control on this small, but accommodating planet:
1 The Sun
2 Electric light
And that’s it. Nothing else.
In fact if you only remember one thing from reading this – remember that and it’ll serve you well.
Trip the light fantastic
So why tell you this? Because in every situation you have a choice between the two – or put it more simply between:
1 Inside light (ie. electric light)
2 Outside light (ie. the sun)
And sometimes a mixture of the two. In the case of Sir Mick, we chose inside light. So we went the whole hog.
That means black-out. Total 100% blinds down, curtains drawn, absolutely pitch black!
Why? One word: control. Just like in life, the more control we have, the more chance things will happen on purpose rather than by accident.
With any lighting situation, you should look to control the environment as much as possible. Be a control freak.
A quick word on coloured gels: approach with caution. Less is more. And remember to KISS: keep it simple, stupid. You don’t want amateur dramatics night at the local village hall. There is only one rule: aim for natural light. Imitate natural light as much as possible. Remember the saying “and then there was light” it is not “and then there was a multi coloured luminescent glow of lime greens, ruby reds and blurry blues”
Just as salt looks better on film than actual rain, if you can fake natural light, you’ve got it made. So fake it til you make it. And play god. Go on. You never know…. maybe, just maybe you might make it look better.
And then there was light
Lets get back to basics. Why do we need to get the lighting right at all? Well if you get it wrong, just like in life where you take short cuts or compromise…. you have to compensate somewhere else. Like in camera.
Which might mean adding gain. And as Harry Enfield’s comic character used to say: “I do not believe you want to do that”
Gain is like ISO in digital still cameras, it’s the light sensitivity of the chip in the camera receiving the image information.
Rule: avoid boosting gain like the proverbial plague. How? Get the lighting right.
And not in post either. It’s too time consuming. So get it right in the moment.
Fundamental rule: Use what’s there. Yes, we could’ve thrown a moving, out-of-focus gobo projection onto the back wall. We could’ve done that. Sure. But we didn’t. Not when there was a perfectly good background in the hotel room. Right there. We used a blue coloured gel because the colour blue makes the subject – in this case Sir Mick – stand out from the background as much as possible and gives that classic “3D effect”. Which is what you want. You want texture and layers. Variety is, after all, the spice of life.
Quick warning: be careful not to effect the subject’s skin colour with coloured gels – for example a green gel can make Sir Mick look a bit like the Incredible Hulk. Or worse still, Kermit the frog. You’re best going for ‘cool’ colours like blue. Remember: blue is best.
Frame of reference
A quick word on framing. For any head and shoulders interview, perhaps its might be best to start with your don’ts:
1 Don’t put Mick in the middle of the frame.
2 Don’t make him so small you can’t see him.
3 Don’t let him look straight at the camera.
Don’t question these. Just don’t do them. I know rules are made to be broken but don’t it, not with these three.
We sit Mick to the left of frame to give him ‘looking space’ - something that is known in the trade as adding “visual speed” to the image.
Framing Mick to the left of frame also adds interest to the shot, breaking symmetry and observing what stills photographers obsessively refer to as “the rule of thirds”. Which basically means dividing the screen into a grid of two horizontal and two vertical lines and then putting stuff in those areas.
Mick should look at the interviewer. Not the camera. But by what angle should Mick be sat? Good question. Well, here comes the science part, turn Sir Mick gently, but firmly 30 to 40% off camera.
Paint it black
Ok I don’t want to come across all arty but what I’m about to talk about here is called Rembrandt lighting. I know it might sound a bit random and high-brow to suddenly reference one of the greatest painters in European history…. but you are after all painting with light. Lets not forget that. You are an artist, of sorts. You work with light. The sun/Dedo lights/DivaLites all create light. Cameras capture light. The screen is your canvas.
Rembrandt lighting refers specifically to that magic triangle of light where there is nose shadow and light in both eyes, giving the face dimension and making Mick’s eyes all nice and sparkly. You want to create shadows. How do you create shadows? All light travels in straight lines – where you break those lines, you get shadows. In the simplest terms, the lighting should never, ever be flat and straight on. Flattening is not flattering.
Bring me sunshine
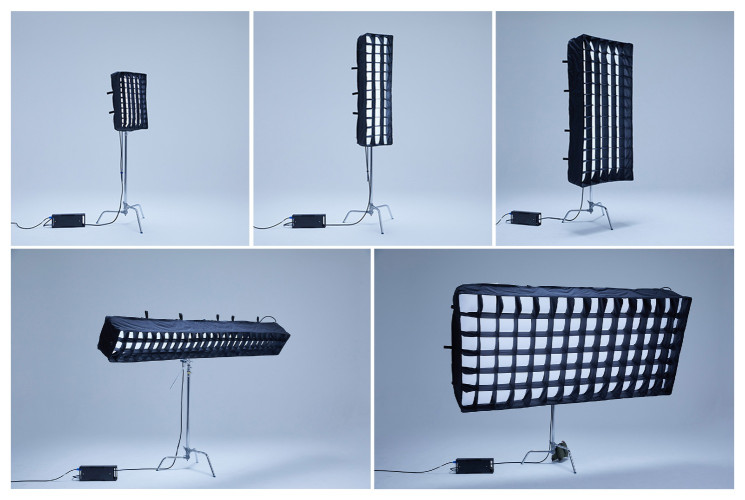
Let’s look at the technical set-up now. Our main or ‘key’ light is the lightweight, compact KinoFlo DivaLite 400, for which we have two different sets of 55W fluorescent tubes – both daylight KF5500 tubes and tungsten KF2900 tubes (for inside) which are colour correct in their right environment.
In the blacked-out hotel room of the opulent decadence of the Soho Hotel suite, we obviously chose the tungsten tubes positioning the DivaLite at a 45 degree angle above Mick’s head, pointing directly into his eyes. So that we didn’t blind him, we then added a 60 degree honeycomb to give a warm, intimate lighting effect, throwing the light where we want it most – on Mick. The DivaLite acts as what we call our “key” light. You should think of this as a replacement of the sun.
In other words, your one and only source of light. This should be your mantra:
“The Diva light is my substitute sun”. So be a pseudo sun worshipper. And bring me sunshine.
It’s only 3 point lighting… But I like it
And so to the detail. The devil, after all, is in the detail. For detail we use Dedo DLH4 24V 150W lamps. Three of them. This achieves, somewhat inevitably, the classic “3 point lighting” situation you may have heard about. These small lamps, with diffusers, add subtlety and soft lighting to lift shadows on Mick’s face. Coloured gels are used to add depth and dimension to the background.
The Dedo lights are positioned as follows: a “fill” light with a 12inch 5-in-1 Photoflex LiteDisc reflector gently lifts the harsh shadows on the left side of Mick’s face and achieves a 2:1 contrast ratio of light/shadow on his face. A “kicker” light on a flexible stand extension, positioned high up behind Mick’s right shoulder provides a lift to the hair and shoulder area with a yellow coloured gel. The “kicker” is crucial to create the illusion of separation of subject from background, or in this case – Mick from wall.
A word of warning though: be careful with the angle of the kicker light, try not to point it into the camera and avoid lens flare at all costs. Finally a back-light with a blue coloured filter throws light onto the background, adding texture, depth and making Mick really stand out from the background so you, the viewer, focus on him.
Like a Rolling Stone
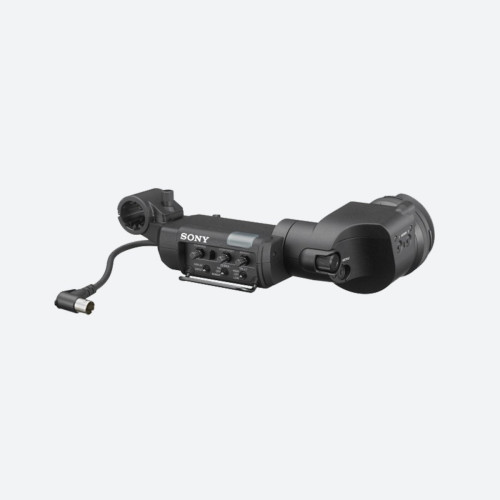
To film the main interview we use the new High Definition tape-less Sony XDCAM HD format PDW-F355 camera. This was ‘locked-off’ or static in conventional interview style – just off to the right of Mick’s eye-line, which meant he could maintain eye-contact with interviewer and former editor of famous film publication Empire magazine, Will Lawrence (pictured on the right with Mick). This was complimented by a second camera to add depth to the interview, another High Definition camera – the Sony EX-1. The second camera was hand-held and transformed into black and white in edit to give it a “filmic” feel. The interesting angles add an extra dimension and give an alternative perspective, picking up on different emotions/expressions, providing the viewer with further insight into Mick’s words.
These cameras are a new breed of ‘tapeless’ technology, which means that instead of recording on traditional tape, they record onto disks and are quite remarkably saved as files which can then be transferred onto an edit suite, much like a normal computer file. Which means greater speed, ease and a more efficient edit process.
Where can you see the interview?
The interview is transmitted on MySpace’s new celebrity channel. This means a potentially huge global audience will see the interview - with MySpace alone having an astonishing 300 million members. Forcefed Media are responsible for all aspects of the production – an innovative technical set-up with state-of-the-art camera equipment to capture this high profile celebrity at top quality. It is this professional set-up that makes Forcefed Media a cut above the rest and make the work really stand out for the client.
So what do you do next if you want to get started with lighting or take it to the next level? We recommend you sign yourself up for a lighting course to extend your knowledge and get some practical advice, there are plenty of good ones out there. Alternatively you can take the pain away and ask us to help you with any lighting situation you may have. Just phone Antony at Forcefed Media on 020 7165 5786 or email antony@forcefed.co.uk or check out our website at www.forcefed.co.uk.
Forcefed Media are specialists in video production, animation, 3D graphics, live events and multimedia. We are experts in our field. Working in both the UK and internationally clients include Coca-Cola, GlaxoSmithKline, Barclays Bank, MTV, Intel, Hewlett Packard, Wembley Stadium, TomTom, LivingTV, Ocean Spray & British Telecom.