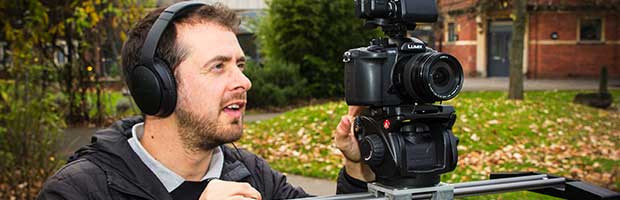
As a DP the video monitor you work with is one of the most important tools on set.
I began my career in 1994 shooting television news for Reuters on Betacam SP and it was very rare that I'd get to use a monitor on location.
As my career evolved I started shooting more considered pieces and used Sony 9\" tube monitors all flight cased up. I shot the ITV travel show "Wish You Were Here…?\" for 2 years and we used to lug that 9\" around the world with us just so we could playback the rushes in the evening.
HD video monitors are such an important tool in film making. For me having a solid and reliable method of accurately seeing focus and exposure is what can make the difference in your confidence on a shoot.
Working with Large Sensor Cameras
As camera formats have evolved and become smaller the need for reliable video monitoring has become more crucial and none more so than in the DSLR video world. Love or hate DSLR’s they have transformed how content is acquired and triggered major camera manufacturers to develop large sensor camcorders so we are now flooded with options.
Big sensors are great, but they do throw up some interesting challenges. Focus and exposure have to be spot on if you want your footage to really sing.
In almost all cases the camera manufacturers built in screens are reasonably ok for framing but none of them are really good enough for critical focus. That's why I rarely shoot without an external HD monitor when working with DLSRs and large sensor cameras.
I first came across Marshall monitors at NAB in 2004 when they introduced a super bright monitor that could be used in bright daylight.
For a while there was a real push towards 5.6\" and 7\" monitors for on board monitoring when users realised they needed more clarity and resolution when shooting with large sensors. But I've recently been working with a 9\" on camera monitor from Marshall and it's been quite an eye opener.
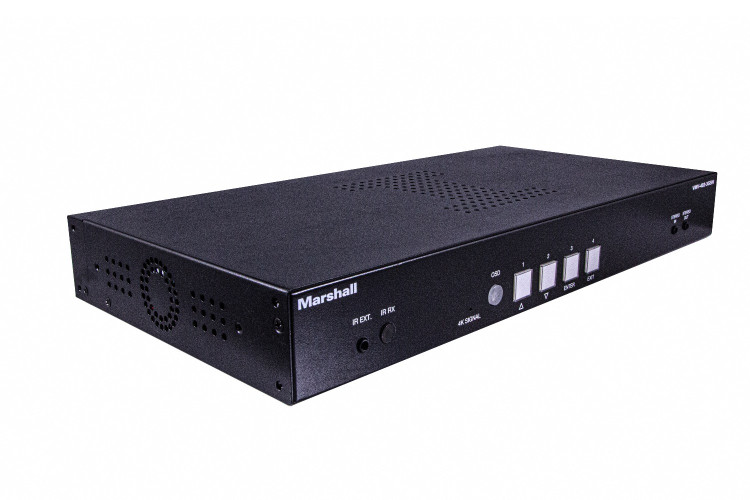
The real estate you can achieve with the V-LCD90MD 9\" is significant with a screen resolution of 1280x768 the clarity of the image is stunning. It's the only monitor I've used that shows me exactly what I'm getting and when I get the footage back into the edit suite it looks exactly as I imagined it would!
What’s more the 9\" LCD High Brightness monitor of today is lightweight and slender compared to the old tube monitors we used to cart around.
Flexibility
I find myself increasing shooting across multiple formats as these days I don’t think you can realistically only shoot on one format or even single out one manufacturer. This also means having to switch between HD-SDI and HDMI as an output connection depending on what camera system you are shooting on with monitors having one or the other input.
The new Marshall V-LCD90MD has a clever multiple I/O option allowing you to add whatever module best suits your shooting set up. For example if your camera has only got HDMI out you can take that HDMI feed into the Marshall and then split that signal out to dual HD-SDI for looping into other on set monitors. So as the DP you can be monitoring and making critical lighting and exposure decisions while the clients and other crew can be working off a separate external monitor fed by HD-SDI.
Alternatively if you need an HD-SDI input to your monitor you can simply swap out the module on the rear of the monitor and use the SDI I/O unit. Simple and effective.
Waveform Monitor
There are a number of tools that I have come to depend on when assessing a monitor’s performance on set. After resolution then my exposure measurement is top of the list. Marshall have really perfected the options here with a sharp and bright waveform - basic but important.
The only way to absolutely guarantee your exposure is to use a waveform. I’ve recently begun colour grading seriously and you rely on an RGB waveform parade to manage consistency and so to maintain the detail in your highlights. On location using a waveform will dramatically improve your chances of gaining a good digital negative.
What I like about the Marshall waveform is that when you go over 100% you can set a RED marker so when working quickly you can have that real security and peace of mind that you’re exposure will be spot on. It's like an early warning system
The advanced options are very very cool too. You can set clipping points for both highlight and shadow clip and set a colour to show when you hit each point. This means while you are busy lighting and assessing the many elements of your frame you are able to quickly see a confidence colour show up if you are entering the range of clip that you have set. I very much like this function as I have two ways for immediately referencing my exposure.
False Color
This is admittedly only something I’ve started using recently. I have Robin Schmidt (@DirSchmidt) to thank for introducing me to this very cool feature.
The False Colour filter is used to aid in the setting of camera exposure. As the camera iris is adjusted, elements of the image will change colour based on the luminance or brightness values. This enables proper exposure to be achieved without the use of costly or complicated external test equipment.
To best utilise this feature, you must understand the colour chart and have a basic understanding of camera exposure. Normally, when shooting subjects like people, it is common practice to set exposure of faces to the equivalent of approximately 56 IRE.
The False Colour filter will show this area as the colour PINK on the monitor. Therefore, as you increase exposure (open the iris), your subject will change colour as indicated on the chart: PINK, then GREY, then a few shades of YELLOW. Overexposed subjects (above 101 IRE) on the monitor will be shown as RED. In addition, underexposed subjects will show as DEEP-BLUE to DARK-BLUE, with clipped-blacks indicated with a FUCHSIA-like colour.
Lastly, the colour GREEN is used to indicate elements of the image that are approximately 45 IRE. This represents a “neutral” or “mid-level” exposure commonly used for objects (not people).
Overall summary
I'm a fan of this monitor. It’s sharp, accurate, modular and lightweight. It packs a lot of punch and is totally reliable when judging exposure on set. Moreover the colour accuracy is spot on, something that is not as common as you might think in working with video monitors. If you're really serious about colour and exposure then check out the range from Marshall - you won’t be disappointed.
About Den Lennie
Den Lennie is a DP and one of the world’s leading coaches on the new wave of digital film making. He runs an online film school at fstopacademy.com and specialises in small group film making workshops all over the world.
Den has worked in the industry for over 20 years and in every major TV genre conceivable, including Music, Documentary,Travel, Sport, Factual & Entertainment. He has worked as an Lighting Cameraman, Director of Photography, Producer, Director, Editor and Colourist and has first-hand experience of every part of the industry and how to create stand – out work. Den is a Sony Independent Certified Expert, A Tiffen Image Maker and in 2012 was the first official global ambassador for Carl Zeiss Lenses.